
Have you always dreamed of being the next “Michael Bae” for your video game? I think this little tutorial will be able to guide you on the way to explosions.
My tutorials are worth being fast and short. Please note that English is just not my mother tongue.
Happy reading dear developers 🙂
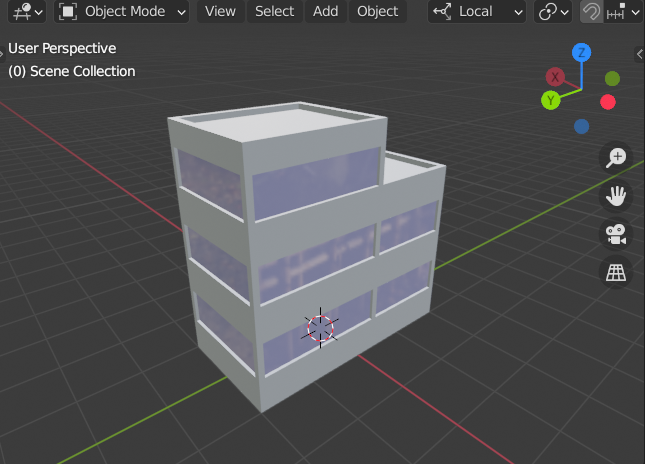
I will assume that you have knowledges with Unity, Blender and C#. At the end of this tutorial, you will be able to have this kind of result:
To get that destruction effect, this tutorial is divided into 4 parts
- 3D models
- Smoke effect
- Scripts
- Test
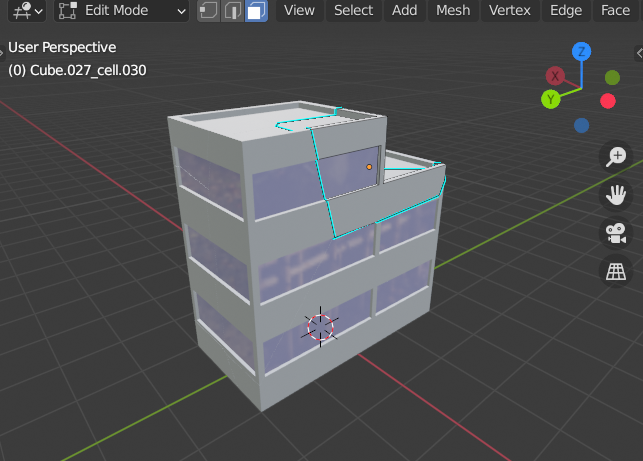
3D models with Blender
You need to enable the Cell Fracture Add-On on Blender to be able to destroy your mesh. For that, simply open the menu : Edit -> Preferences -> Adds-on . Search for Cell Fracture and check the box
Before using the plugin, it is important to check that your object is correct in terms of modeling. I had some problems like duplicate or missing parts after using the plugin. A solution was to Degenerate Dissolve the mesh by selecting the intact model in Edit Mode and then clicking on the menu Mesh -> Clean Up -> Degenerate Dissolve.
For each model, use a collection (collection_intact and collection_destroyed for example). Now, simply duplicate your intact model and use the plugin Cell Fracture for the destroyed version.
I usually use these parameters :
- In Point Source
- Own Particles
- Source Limit : 15
- Recursive Shatter
- Small / Random
- Scene
- Collection : write the name of the destroyed version of your building
Click “Ok” and delete the intact version in the collection where you have the destroyed building.
Export the intact and destroyed version with the FBX format
Smoke effect
Create a new particule system with these parameters by adjusting/testing them to have the better effect :
- Duration: 5.00
- Start Lifetime: 5.00
- Start Speed: Use “Curves” to have a better effect
- Gravity modifier: 0
- Play On Awake: disabled
- Max Particle: 1000
- Emission
- Rate over Time: 50
- Shape
- Shape: Cone
- Angle: 80
- Size over Lifetime
- Size: Use “Curves” to have a better effect
- Rotation over Lifetime
- Angular Velocity: Random Between Two Constants (0 and 90)
- Collision
- Type: Plane (in my case, it’s my terrain)
- Renderer
- Material: You can use a self-made 2D sprite or a free one you found on the Web 🙂
Scripts
Two scripts are necessary to make the destruction of our buildings work.
DestructibleObjectController
The first script is attached to the intact building. This one will allow you to attach the destroyed version of this intact building. When the player click on the building, the destroyed version is instantied an the intact version is simply removed
using System.Collections;
using System.Collections.Generic;
using UnityEngine;
/**
* Used for a destructible object (buildings, cars etc)
**/
public class DestructibleObjectController : MonoBehaviour {
[SerializeField]
GameObject destroyedVersion;
public void DestroyIt() {
// Instantiate the destroyed version
Instantiate(destroyedVersion, transform.position, transform.rotation);
// Destroy the intact version
Destroy(gameObject);
}
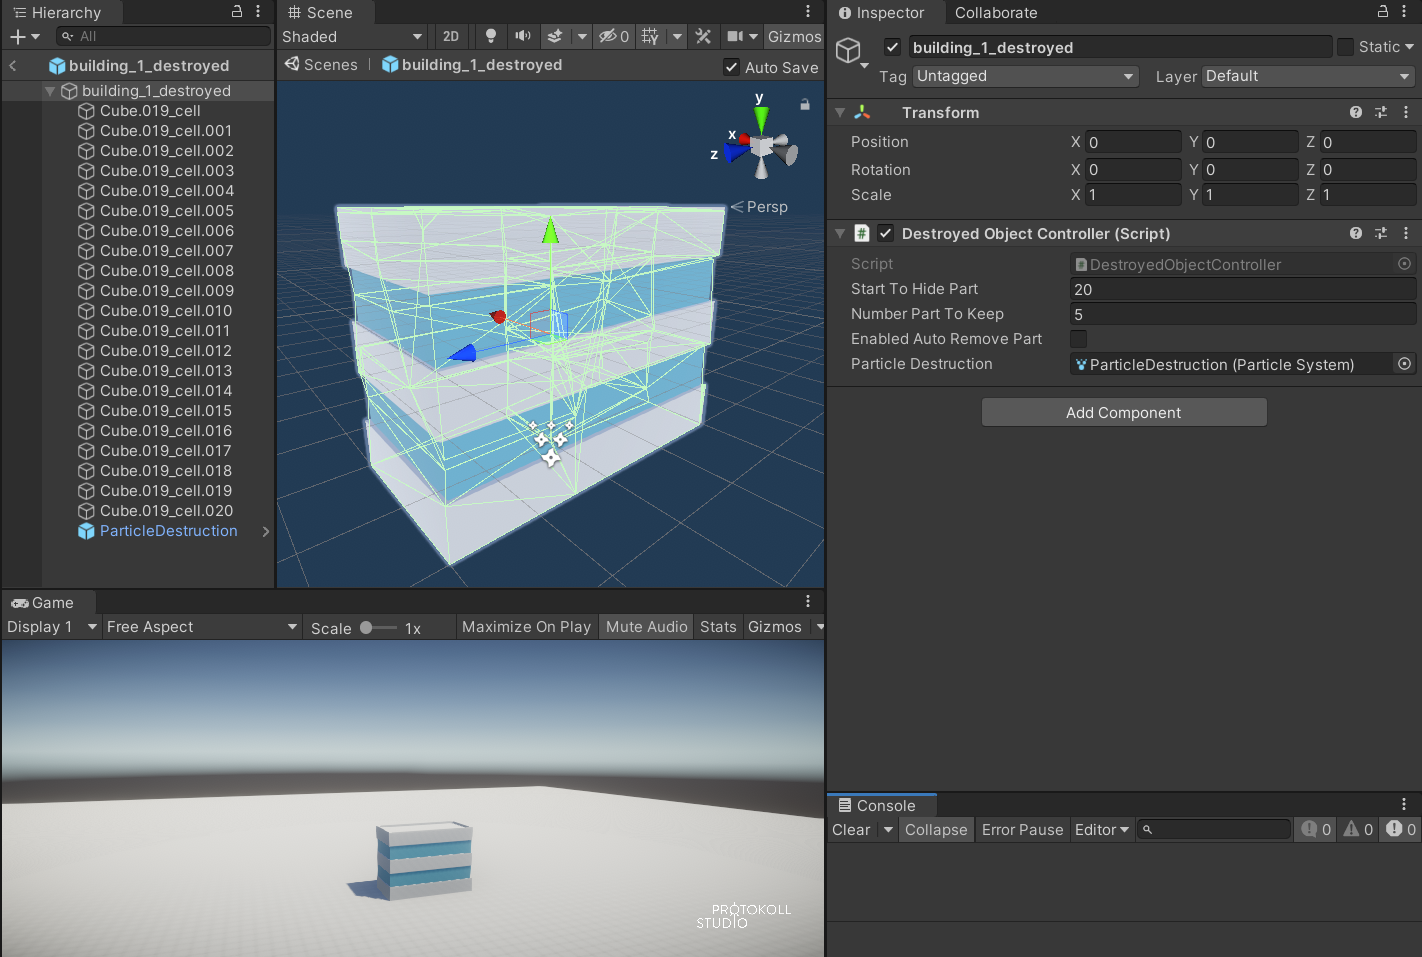
}DestroyedController
The second script is attached to the destroyed version of the building (usually a prefab) . It is used to play the smoke effect in the building.
using System.Collections;
using System.Collections.Generic;
using UnityEngine;

/**
 * Used by a destroyed object
 **/
public class DestroyedObjectController : MonoBehaviour {

    // List Destroyed GameObject
    List<GameObject> listDestroyedPart = new List<GameObject> ();

    // Counter
    [SerializeField]
    float startToHidePart = 10f; // After 10 seconds, we hide some destroyed part
    [SerializeField]
    int numberPartToKeep = 5;
    [SerializeField]
    bool enabledAutoRemovePart = false;
    float counter = 0;
    bool counterStopped = false;

    // Effect
    [SerializeField]
    ParticleSystem particleDestruction;

    // Start is called before the first frame update
    void Start () {
        // Start the particle destruction
        particleDestruction.Play();

        // Count how much destroyed part we have
        int totalDestroyPart = 0;
        foreach (Transform destroyedPart in transform) {
            totalDestroyPart += 1;
            listDestroyedPart.Add (destroyedPart.gameObject);
        }
        Debug.Log ("Number of destroyed part : " + totalDestroyPart);
        Debug.Log (listDestroyedPart.Count);
    }

    // Update is called once per frame
    void Update () {
        if (!counterStopped && enabledAutoRemovePart) {
            counter += Time.deltaTime;

            if (counter >= startToHidePart) {
                StartCoroutine (DestroyPart ());
            }
        }
    }

    // Wait 1 second before destroying a destroyed part (mesh)
    IEnumerator DestroyPart () {
        // Destroy each element but keep NUMBERPARTTOKEEP
        for (int i = 0; i < listDestroyedPart.Count - numberPartToKeep; i++) {
            // StartCoroutine (DestroyPart (i));
            Destroy (listDestroyedPart[i].gameObject);
            yield return new WaitForSeconds (1);
        }
        counterStopped = true;

    }
}
Test
You have now your two scripts, your smoke effect particule and your two buildings models (intact and destroyed). It’s time to test that.
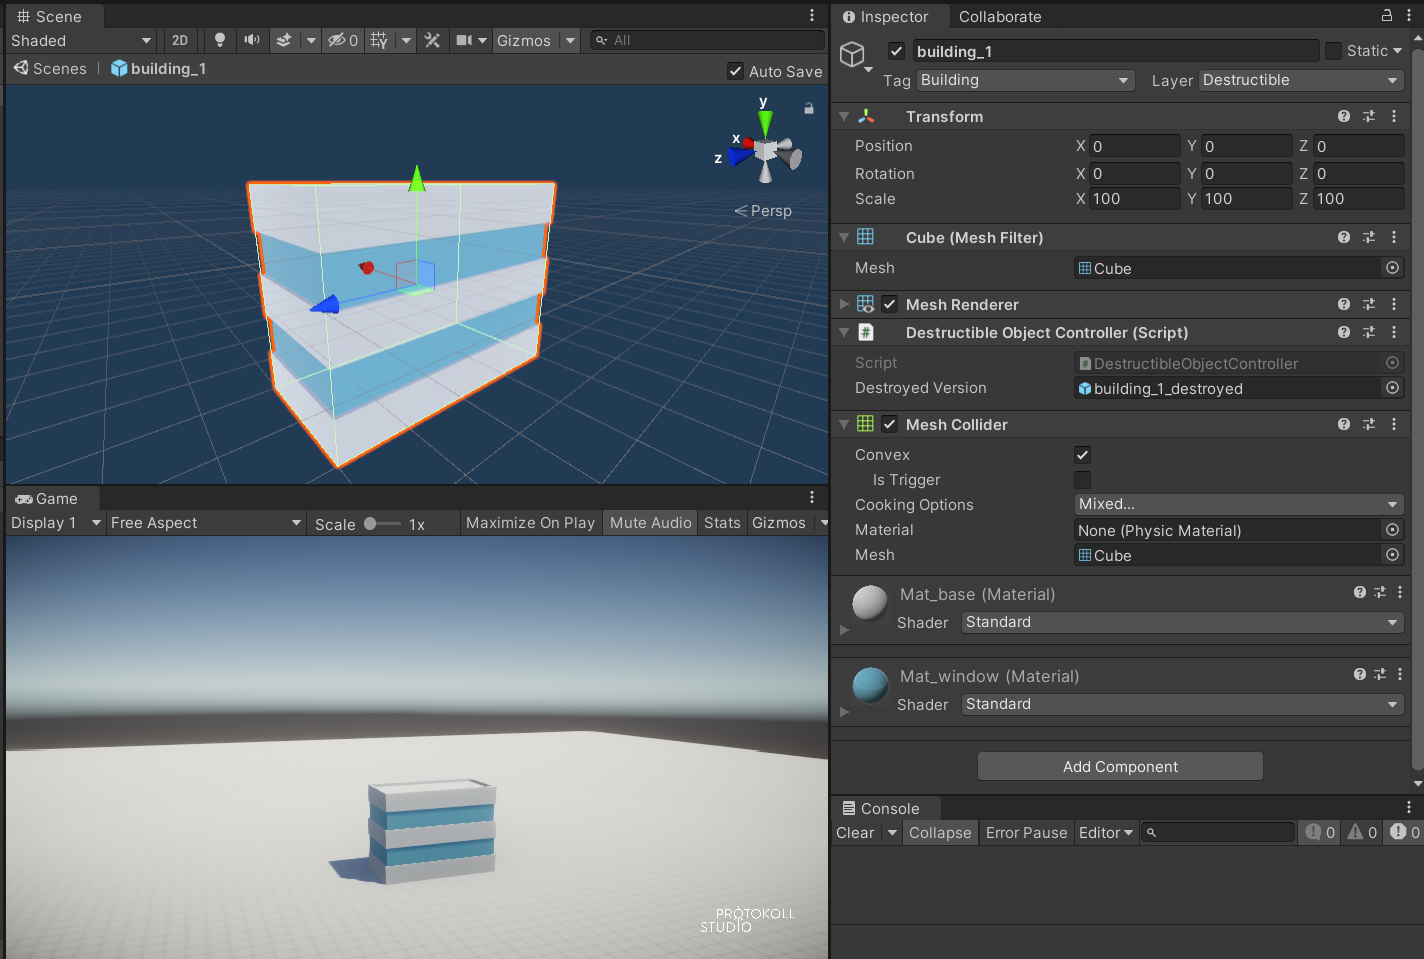
First, attach the script DestructibleObjectController on the prefab of the intact model.
Don’t forget to add the tag Building and the layer Destructible
Add the Mesh Collider component and enable the checkbox for Convex.
Attach the script DestroyedController on the prefab of the destroyed building.
In the hierarchy, add your smoke effect as a child
Set the Particle Destruction with your smoke effect
You can enable the Auto Remove Part after the destruction is finished. It will remove a number of destroyed part you can specifiy in Number Part To Keep
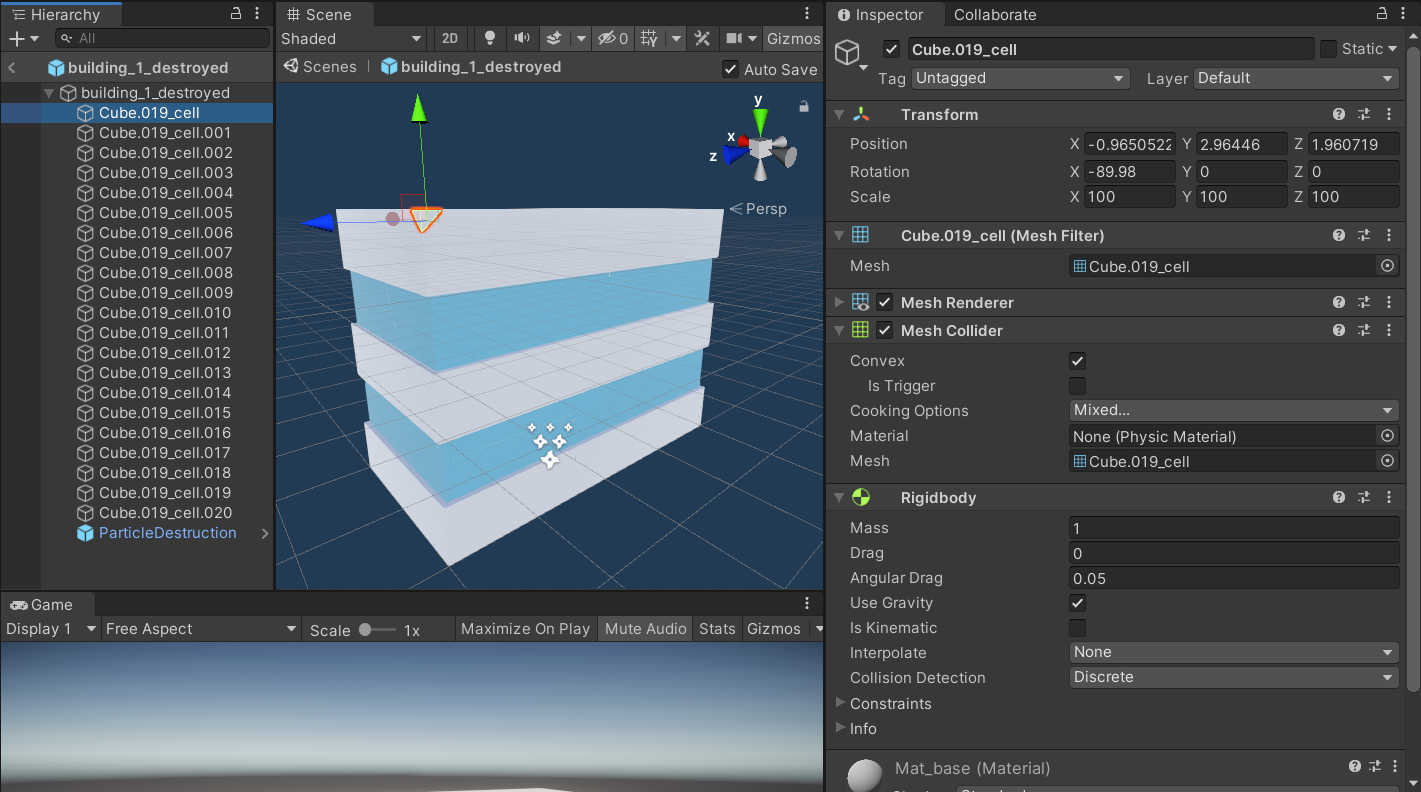
For each of your destroyed part, add a the component Mesh Collider and a Rigidbody
Check the Convex box in the mesh collider
Press Play and Voilà! 🙂